My Motto

May the muffin rise to greet you, may your friends be always at your door, and until we meet again, warm a single-malt in the palm of your hand and make something homemade for someone you love.

Tuesday, August 31, 2010

Raspberry Cannoli Buckle

That is creme fraiche on top
There are some foods that I have been on a twenty year quest to conquer;  to find the absolute ideal recipe for, and this is one of them.  Sometimes, you get lucky.  For instance, I finally found the perfect baked macaroni and cheese recipe a few years ago, and could put that to rest, much to our delight.  However, the search continues for the perfect brownie.  Tyler Florence's Amarreto Brownie recipe comes close, but it has a crunchy, flaky crust on top that I don't like.  I want a brownie that is deep, intensely chocolate and chewy, but not gooey.  I have tried at least 25 different recipes, plus countless original variations.  If I make Tyler's brownie batter, and then make the Ghirardelli dark chocolate brownie mix and stir both batters together, that is darn near what I'm looking for.  But that's cheating.
As for buckle, the quest started when I was 18.  Growing up in the 70's, I had a neighbor who made really good blueberry buckle, and graciously gave me the recipe.  While in high school, I used to make it all the time, but during college I lost the recipe card.  Since then I've tried every buckle recipe I've come across, but none have been right.  Until this.  This recipe was adapted from one in a little pamphlet put out by the Maine Wild Blueberry Company.  I substituted raspberries and added 1/2 cup of ricotta cheese and 1/2 teaspoon almond extract.  Now we're talking. This is one quest I can put to rest........now if only I could find the perfect brownie recipe...
Raspberry Cannoli Buckle

Batter:
3/4 cup sugar
1/2 cup butter, softened
1 egg
3/4 cup milk
1/2 cup ricotta cheese
1 egg
1/2 teaspoon vanilla
1/2 teaspoon almond extract
2 cups flour
2 teaspoons baking powder
1/2 teaspoon salt
1 1/2 cups fresh raspberries

Crumb Topping:
1/2 cup firmly packed brown sugar
1/3 cup flour
3/4 teaspoon cinnamon
1/4 cup cold butter, cut into small pieces

Preheat oven to 375 degrees.  Grease and flour a 9-inch square baking dish.  Cream butter with sugar.  Add egg and beat well.  Stir in ricotta cheese and flavorings.  Sift flour with baking powder and salt.  Add to creamed butter mixture alternately with milk.  Do not over beat.  Gently fold in raspberries.

To make topping, place all ingredients in a medium bowl and then smash it together with your fingers, pressing the pieces of butter into the dry ingredients until you have a crumbly mixture.  

Spread batter in prepared pan and sprinkle topping evenly over.  Bake approximately 45 minutes.  Serve warm with creme fraiche, whipped cream or vanilla ice cream.

Monday, August 30, 2010

Home Made Crème Fraiche

This is the instant version and it was fab too!
Every once in a while a recipe I'd like to make calls for creme fraiche.  My local market doesn't sell it, so when I learned you could make it yourself, I jumped at it.  What can I say?  I'm a Yankee.  There are specialty markets around that sell it, but it can be expensive, and why make a special trip when you can make it yourself, very easily?  And it's not as if you're making a substitute, this is the real thing.  The recipes came from the regional cookbook, Marblehead Cooks.  Creme fraiche has a slightly tangy taste and a velvety, luxurious texture that can really dress up a dish.  I love all things cool and creamy and where that is concerned, creme fraiche is just the Belle of the ball.  If a doctor ever told me I was lactose intolerant, I might actually want to shoot myself.
This took about 18 hours to thicken

Home Made Crème Fraiche

1 cup whipping cream
2 tablespoons buttermilk

Combine cream and buttermilk in a glass jar and whisk until well blended.  Cover and let stand at room temperature in a draft-free area, whisking several times, until mixture has thickened (about 24 hours).  Chill thoroughly before using.  Crème fraiche will keep covered in a refrigerator for 10 days to 2 weeks.


Instant Crème Fraiche


1 cup whipping cream, whipped with 2 tablespoons powdered sugar
3-4 tablespoons sour cream

Fold whipped cream into sour cream.  Cover and chill until serving time.  Instant Crème Fraiche will keep covered in refrigerator for 1-2 days.

     10 Easy Uses of Crème Fraiche:
  1. On toast with jam or smoked salmon and capers
  2. Anywhere you would use whipped cream, or whipped together in equal parts with whipped cream
  3. Add a dollop on soup (hot or cold)
  4. Add a dollop on scrambled eggs or an omelet
  5. Add a dollop on a baked potato
  6. Add a dollop on fresh berries or cooked fruit (baked apples, bananas foster, grilled peaches)
  7. Add a tablespoon to pesto before you toss it with pasta
  8. Stir in horseradish with a squeeze of fresh lime as a topping for fish or roast beef
  9. Add a spoonful to sauteed mushrooms and shallots for a creamy finish
  10. Stir together 1 1/2 cups creme fraiche with 1 1/2 cups gruyere cheese and pour over 3 pounds peeled, thinly sliced potatoes for a lovely gratin (bake 1 hour at 350).


Sunday, August 29, 2010

GUEST RECIPE SUNDAY! S'mores Cheesecake

Today is the first (I hope of many) Guest Recipe Sunday's.  The idea is to dedicate the Sunday post to recipes that are submitted by friends/readers/followers. If you're reading this, then chances are good that you like to cook too.  Send me a recipe you wouldn't mind me sharing and I'll make it and post it some Sunday, giving you credit of course (if you have a blog, I'll plug that too).  Don't be shy, c'mon, if you like it, I will!  It can be from any category, and I'll post them in the order I receive them (if I receive any others!)
The recipe for today was submitted by my cousin Michael Dailey from North Carolina.  It is just in time for your Labor Day picnic.  This cheesecake comes out beautifully, and it tastes as good as it looks (which, by the way, is ten times better than the actual S'mores for which it is named)!  Thank you Michael!

S'mores Cheesecake


Crust Ingredients:
2 1/4 cups graham cracker crumbs (about 36 squares)
1/3 cup sugar
1/2 cup butter, melted


Filling:
2 packages (8 ounces each) cream cheese, softened
1 can (14 ounces) sweetened condensed milk
2 teaspoons vanilla extract
3 eggs, lightly beaten
1 cup miniature semisweet chocolate chips
1 cup mini marshmallows


Topping:
1 cup miniature marshmallows
1/2 semisweet chocolate chips
1 tablespoon shortening


Preheat oven to 325 degrees.  In a small bowl, combine cracker crumbs and sugar.  Stir in butter.  Press onto the bottom and up the sides of a 10 inch springform pan.  Set aside.


In a large bowl, beat together the cream cheese, milk and vanilla until smooth.  Add eggs and beat on low just until combined.  Stir in 1 cup chocolate chips and 1 cup marshmallows.  Pour over crust.  Place on baking sheet.


Bake at 325 degrees for 40-45 minutes or until center is almost set.  Sprinkle with marshmallows.  Bake 4-6 minutes longer or until marshmallows are puffed.


Melt chocolate chips with the shortening, on low and stirring constantly until smooth.  Drizzle over marshmallows.  Cool on a wire rack for 10 minutes.  Carefully run a knife around the edge of the pan to loosen.  Cool 1 hour before refrigerating.  Refrigerate overnight.  12 servings.

Saturday, August 28, 2010

Pennsylvania Dutch Chicken Corn and Noodle Soup

You know how there are just some meals you never forget?  About 10 years ago, my son's best friend at the time had grandparents that lived in Lancaster County, PA;  smack dab in the middle of Amish country.  They lived on a beautiful farm and graciously had us as guests one Columbus Day weekend.  We had the rare honor of supping at the neighboring Amish family's home, complete with German prayers and songs.  They allowed this as a favor to their "English" friends, because they had been kind and were good neighbors.   They were extremely hospitable and put out a beautiful spread, but  I was most intrigued with the "Chow-Chow" because I had never heard of it before.  It was a home-jarred mixture of garden vegetables, maybe slightly pickled, that was colorful and delicious and looked like it would be fun to can.  I wish now that I had asked for the recipe.  In fact, if you have one, please send it to me!

On that trip, we ate at what I can only describe as a Pennsylvania Dutch diner.  I cannot remember the name, but there was a windmill on the roof.  I had the chicken, corn and noodle soup and it was delicious and memorable, considering I'm still thinking of it 10 years later.  I adapted this recipe from one in Cook's Country magazine.  It was spot on, and so quick and easy to throw together, only 30 minutes total.  Most definitely in the rotation now.

Pennsylvania Dutch Chicken Corn and Noodle Soup

1 bag frozen corn, thawed
8 cups chicken broth
1 tablespoon butter
1 onion, chopped
1 celery rib, sliced thin
salt and pepper to taste
2 boneless, skinless chicken breasts, cut into 1/2 inch pieces
3 cups egg noodles

Combine corn and 2 cups broth in blender and puree.  Melt butter in a Dutch oven over medium high heat and cook onion and celery until softened.  Add remaining broth, then puree, remaining corn, chicken, seasonings and egg noodles.  Simmer for 10-15 minutes.  Serves 6.

Friday, August 27, 2010

Tipsy Vanilla (Home-made Pure Madagascar Bourbon Vanilla Extract)

This is what it looks like one week after starting

2 weeks and 6 mos, respectively. The 6 mos. aged one has split beans. 

My mother always made her own pure vanilla extract.  That's all we ever used, and we did a lot of baking.  It smells heavenly and tastes better than anything we could buy.  I wish this was smell-a-vision, so you could smell it and that's all it would take.  Everyone knows that imitation vanilla flavoring is crap and you shouldn't use it.  A good pure vanilla extract is best for baking, but it is expensive.  At my grocery store, a 4 ounce bottle costs $7.99, and it contains water and sugar and coloring to darken it.   You can make 16 ounces (1 pint) of this for $10. It's much less expensive and get this, IT TASTES BETTER!  You need to find some good quality Madagascar Bourbon vanilla beans for this, stale old cheap ones won't work.  It needs 3 months to "steep" but if you start some now, you'll have it in time for your holiday baking or for giving as gifts.  Find a pretty bottle, add a bow and your foodie friends will flip!  Vanilla martini anyone?  

Tipsy Vanilla 

1 pint PLAIN vodka 
2 Madagascar Bourbon vanilla beans (you need good quality beans for this, it makes all the difference in the world)

Place vanilla beans into pint of vodka.  Don't use the fancy stuff in your freezer.  Just plain old vodka will do.  Replace cap, and let sit for 3 months.  You can split the beans if you prefer to release the tiny vanilla bean seeds, but they will still work if you leave them in tact.  It doesn't go bad, the flavor only intensifies with age.

Chocolate Almond Biscotti

Today was supposed to be lemon mousse day.  Lemon mousse to kiss the Summer goodbye.  It actually came out great.  It was so tart and luscious and it lasted four days in the fridge, giving us a long, lingering goodbye.  I really wanted to share the recipe with you, but the photo was crap, and by the time I realized it, we had already busted into the mousse and ruined the moment.  Oh well, so here we are.  Around here we've had a couple of blustery days that have turned my mind to Fall, and all things warm, cozy and comforting, like a mug of coffee that actually steams again, that you want to hold just to warm your fingers up.

In the morning, I love sweet things with coffee and this biscotti hits that spot.  The one I keep a good bar of 85% cacao chocolate in the drawer for, when I need a fix.  It is dark and rich, with a note of mocha, and studded with chocolate chips and almonds.  Dunked in coffee, it just makes you pause and think "mmmmmmm."

Chocolate Almond Biscotti

    2 1/2 cups flour
   ¾  cups cocoa powder
   ¼ teaspoon salt
   ½ teaspoon espresso powder
   1 tablespoon baking powder
   1/2 cup butter
   1 cup sugar
   3 eggs, plus 1 beaten yolk for brushing the top
   1 teaspoon pure vanilla extract
   1/2 teaspoon almond extract 
   1 cup slivered almonds plus ¼ cup for sprinkling on top
   1 cup semi-sweet chocolate chips

Preheat oven to 400 degrees. Cream sugar and butter. Beat in the eggs, vanilla and almond extracts.  In a medium bowl, stir together the dry ingredients, then add to the wet ingredients and beat well.  Stir in the chocolate chips and almonds.  On a cookie sheet (I use parchment paper, but it is optional), shape the dough into a long loaf (wet your hands a little, so they don't stick) and brush with the beaten egg yolk.  Sprinkle with slivered almonds.
Bake for 25 minutes. Remove from oven and let cool completely. Cut the loaf into 1 inch slices. Reduce heat to 350 degrees, and place slices back into the oven. Bake for another 10 minutes, then remove from the oven and cool completely. 

Thursday, August 26, 2010

Fresh Peach Salsa


I can't decide if I love or hate this time of the year.  On the one hand, it's peach season!  I love to blanch, peel and slice them, toss them with some lemon juice and a teaspoon of sugar and make peach shortcake (it's even better than strawberry shortcake), or toss them with Grand Marnier and spoon over vanilla ice cream - downright sensuous.  On the other hand, Summer is almost over.....WHO AM I KIDDING?!  School starts in five days. I LOVE this time of year.  Soon there will be peace, quiet, time and order.  The fact that I am still unemployed is a bit of a buzz-kill, but hey!  More time to cook!

I've been making this peach salsa for years and it is so good, we often eat bowls full of it, although it is especially good paired with grilled fish, chicken or pork.  It's really easy to make, only about 15 minutes start to finish, and is best eaten the same day.  
Fresh Peach Salsa

3 ripe peaches
1/2 fresh lemon
1 cup peeled, seeded and diced cucumber
2 tablespoons sliced green onion (the white part)
1/2 jalapeño pepper, seeded and minced
1 tablespoon sugar
1 tablespoon vegetable oil
1 tablespoon vinegar

Fill a large bowl halfway with ice and water.  Set this aside.  Place peaches into a pot of boiling water for one minute.  Remove with tongs and plunge into the bowl of ice water.  Remove peaches and the peels should come off easily.  Cut peaches in half, then dice and put into a large bowl.  Squeeze the 1/2 lemon over the diced peaches, catching lemon seeds with your hand.  Toss peaches with the lemon juice, then add the remaining ingredients and toss lightly.  Cover with plastic wrap and store in the refrigerator.  Best served cold.


Wednesday, August 25, 2010

Grandma Dailey's Rolls

"And the best bread was of my mother's own making --the best in all the land!"
--Old Memories, Sir Henry James
My maternal grandparents lived in Binghamton, New York.  We used to visit them once a year, and there were a few things you could count on.  There would be a banana cream pie in the fridge; we would have either spiedies (only folks from Binghamton know what these are) or spaghetti and meatballs; and Grandma would make her family famous rolls.  One of the last times she was in town visiting my mother, I pinned her down on the recipe.  She had it all in her head, but she let me follow her through the process, taking notes and measurements.  The recipe was large, so for our purposes here, I've halved it for practicality and it will make one 13x9 inch pan of rolls, either 8, 12 or 16 rolls depending on the size you form them.
These rolls are the best.  The dough is rich, and just a hint sweet, almost like Brioche.  Aside from dinner rolls, they are fantastic the next day, split, toasted and slathered with butter.  In fact, as long as they're in the house, they're all I want to eat. 
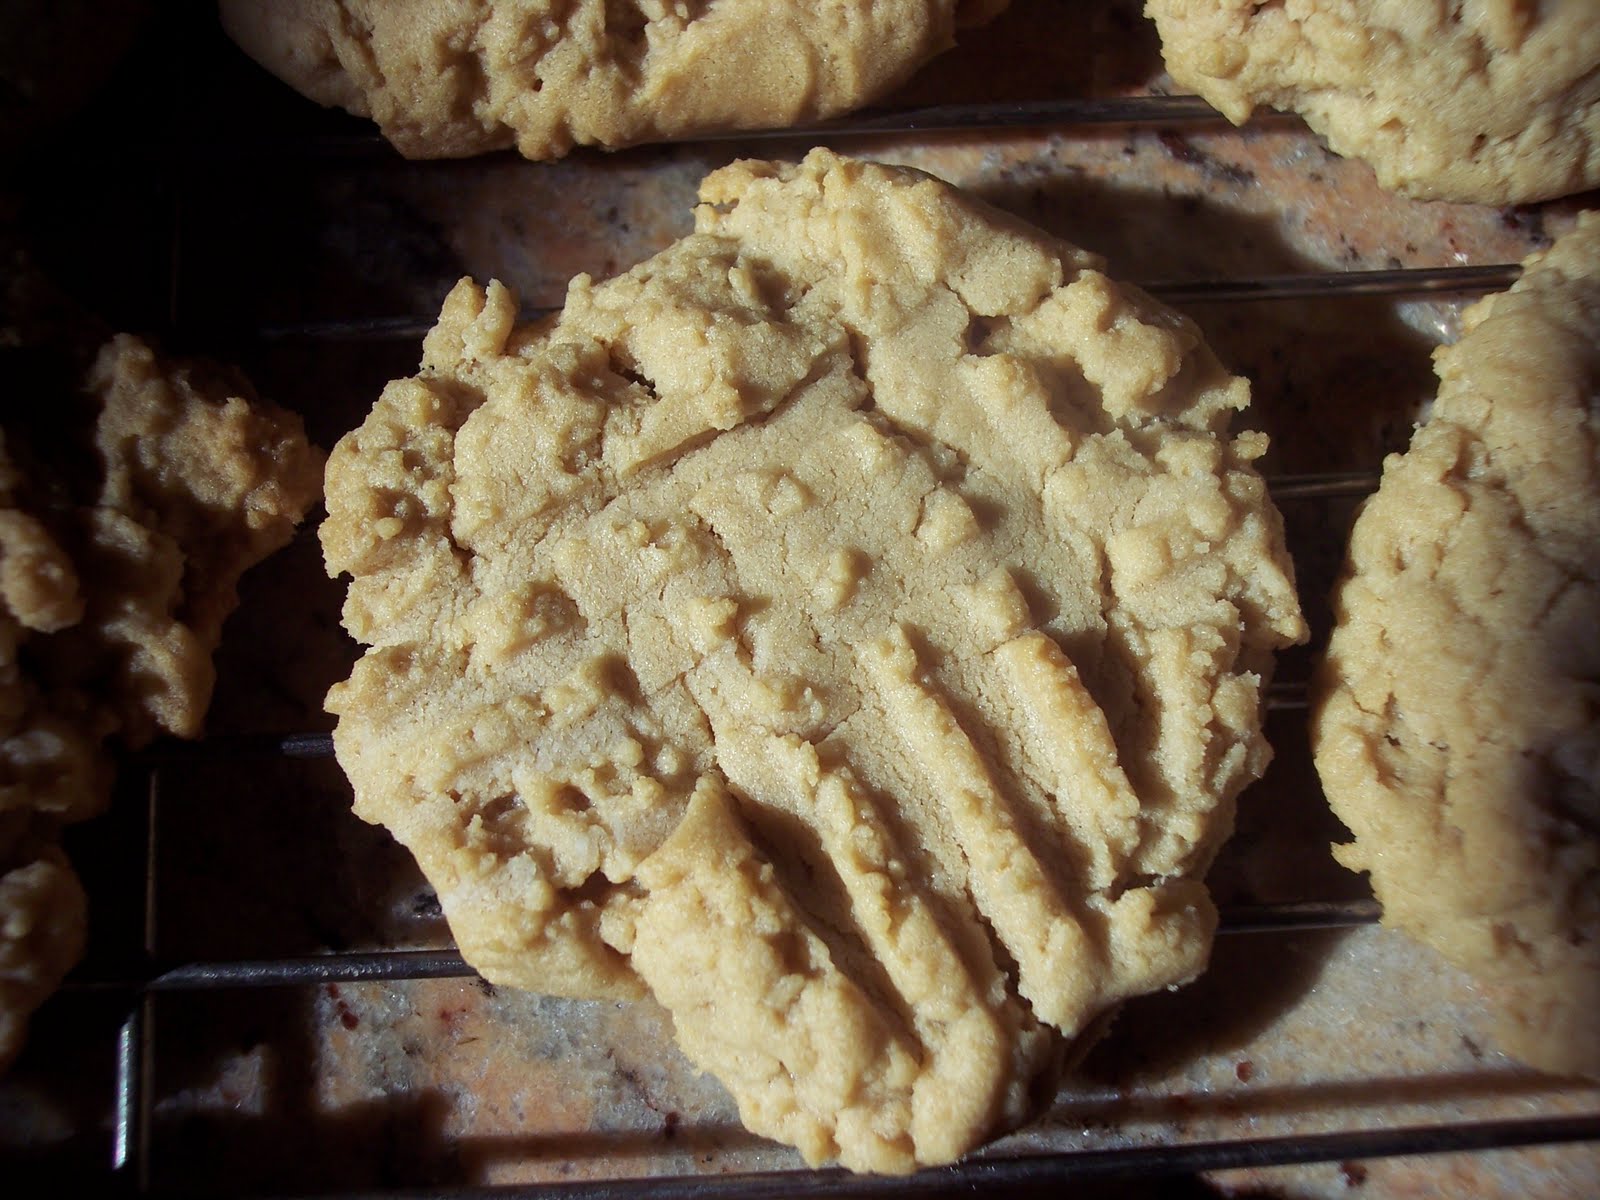
These are huge, I should be a Texan
They make a great sandwich roll, but the bread itself tastes so good, I don't want anything getting in the way of it's yeasty goodness, so give me bread and butter and a tall glass of cold milk.  It's one occasion when simplicity rules.    

Now let me talk you into making these, even if you've never attempted homemade bread before. These rolls are reason enough to try. It really isn't hard, there are just a couple basics you should know before you start.  And let me tell you, the smell of fresh bread baking, and the taste of  it, cannot be duplicated, and the results are so rewarding.

Start with fresh yeast, and proof it (directions in recipe below) to be certain it is viable.  There are many variables with flour.  The type you use, the humidity outside and the altitude you live at can all make a difference in how much flour will be needed.  It's more about the feel of the dough.  When it becomes too difficult to stir, and pulls away from the side of the bowl, then it is ready to knead, now matter how much flour you've added.  Don't let this scare you. It's very forgiving.  A little more or less will not ruin it, you just need to be able to handle it.  Use lots of flour on your kneading surface at first, and keep plenty handy.  When you first turn the dough out to be kneaded, it can be sticky, but if you have lots of flour on the board, and sprinkle the dough with plenty, it will still be easy to handle.  Don't be afraid of kneading.  Again, it is very forgiving.  You don't need perfect technique to make fabulous bread.  Please try these rolls.  You'll become famous for them in your family, like my lovely Gradma Dailey was in ours.

Grandma Dailey's Rolls

1 cup evaporated milk (no substitutes, I think this is the secret to their great taste)
1/3 cup butter
1/3 cup sugar
2 eggs
1 rounded teaspoon salt
4-5 cups flour, plus more for flouring work surface
1 packet dry yeast (check expiration date)
1 tablespoon vegetable oil
1 tablespoon melted butter

In a small bowl, stir together 1/4 cup warm water, a pinch of sugar and the yeast.  Set aside to proof.  In about 5 minutes, it should start foaming, proving the yeast is viable.  If it doesn't foam, you need to try again, with fresher yeast.  

In a small saucepan, slowly heat the evaporated milk with the butter until the butter melts.  Set aside to cool slightly, until it's just very warm, but not hot (it cannot be over 105 degrees or it will kill the yeast).  Pour warm evaporated milk and butter into a large mixing bowl.  Stir in the foamy yeast.  Beat in eggs, one at a time, then sugar and salt.  Beat in 2 cups of flour, then add flour in 1/2 cup increments, until the dough starts to pull away from the sides of the bowl, and it becomes very difficult to stir.

Turn dough out onto a liberally floured working surface, sprinkle dough with more flour and knead for 5 minutes, until the dough is smooth and elastic.  To knead, reach over the dough to side farthest from you, grab the dough and fold it half towards you.  Give it a quarter turn away from you and press the heel of your palms into the dough, pushing away from you.  Fold, turn, press, repeat.  That's all there is to it.  

Put 1 tablespoon of vegetable oil in a large bowl.  Put dough in bowl and turn to coat with oil, cover bowl with a damp warm cloth, or plastic wrap.  Set in the warmest room of the house to rise.  Let rise until double in bulk, around 1 1/2 to 2 hours.  Punch down dough.  Cut in half, then cut in half again.  Decide how many rolls you want in the dish and form equal size balls.  You want them to be smooth on the top, so tuck any jagged edges underneath and place rolls in greased pan, smooth side up.  Cover pan with a damp warm dish cloth.  Let rise until doubled in bulk, 1 - 2 hours.  
Preheat oven to 375 degrees.  
Uncover rolls and bake for 30-40 minutes, until golden brown and hollow sounding when you tap the top.  Brush tops of rolls with melted butter.  Serve within 24-36 hours, or freeze for a special occasion.


Tuesday, August 24, 2010

Wild Rice Soup


My mother's favorite cookbook was Fanny Farmer.  That cookbook had basic recipes for everything you could think of.  Kind of like The Betty Crocker Cookbook, but a little more sophisticated.  Like Betty Crocker in heels.  I learned how to make roux from Fanny Farmer when I was 11, which led to an awesome cheese souffle, which led to wanting to make everything, which... basically.... led here.

I love regional cookbooks and stumbled across one in the cupboard of the lake house a couple of weeks ago.  It was called Marblehead Cooks, as in Marblehead Massachusetts. There were notations in it from the owner, which made me take notice of a few of the recipes.  I contacted the lake house owner to ask her if she would mind if I shared them on the blog.

The following recipe is from that cookbook. The notation of "excellent" in the border was all the nudge I needed to try it.  It was the easiest soup I ever made.  Simple, but deliciously satisfying.  Nutty and creamy with a hint of Sherry.  You have to cook the rice before you make the soup and that takes 45 minutes to an hour (you could do it the night before), but after that it only takes about 20 minutes.  Easy, quick, inexpensive, DELICIOUS, good for you;  what's not to love?

Wild Rice Soup 

6 tablespoons butter
2 tablespoons minced onion
½ cup flour
3 cups chicken broth
2 cups cooked wild rice
½ teaspoon salt
A pinch of dried thyme
1 cup half and half
2 tablespoons dry sherry
Snipped parsley or chives

Melt the butter in a saucepan and sauté the onion until tender.  Blend in the flour and cook for 2 minutes; gradually stir in the broth.  Cook, stirring constantly, until the mixture comes to a boil; boil and stir 1 minute.  Stir in the rice, thyme and salt.  Simmer about 5 minutes.  Blend in half and half and sherry; heat to serving temperature.  Garnish with parsley and /or chives.

Monday, August 23, 2010

Double the Peanut Butter Cookies

Curtis flew back to college Saturday. This morning I forgot he was gone for a moment and almost went upstairs to wake him up. We had him for 3 fleeting weeks and won't see him again until Thanksgiving.  Before he left, we had a little going away party, for which I asked him if there was anything he wanted me to make.  You see where I'm going with this?  "Yes," he said, "please make your peanut butter cookies."

I know everyone already has a peanut butter cookie recipe, but my kids and their friends are always asking me to make these.  My recipe uses double the amount of peanut butter and I don't roll them in sugar before I flatten and bake them.  They stay moist and tender and aren't sugary sweet, just very peanut-buttery. I always make a double batch, because otherwise they're gone before I go to bed.

Double the Peanut Butter Cookies
Makes 2 dozen cookies


1 cup smooth peanut butter (I always use Skippy)
1/4 cup Crisco (this is important for texture)
1/4 cup butter
1/2 cup sugar
1/2 cup brown sugar
1 egg
1/2 teaspoon vanilla
1 1/4 cups flour
1/2 teaspoon baking soda
1/2 teaspoon salt


Preheat oven to 350 degrees.  Blend the Crisco, butter and peanut butters.  Add the sugars and blend well.  Add the egg and vanilla and blend well.  In a separate bowl, mix together the flour, baking soda and salt.  Add to the peanut butter mixture and mix well.


Drop the dough by tablespoons onto the cookie sheet.  Do not roll into balls first.  You want the cookies to have lots of craggy edges.  Using a fork dipped in flour, make cross-hatch marks on the cookies, dipping the fork in flour with each use.


Bake for 11 minutes, until slightly browned.  Cool on the cookie sheet for a few minutes before you transfer them to a cooling rack.  

Sunday, August 22, 2010

Easy Penne with Shrimp and Vodka Sauce

This is actually a really easy dish.   Easy enough for a weeknight, but good enough for company.  For this recipe, I did some research, decided what I wanted to do and knocked it out of the park on the first attempt.  Whatever you do, don't skip the hot sauce though, because that's what makes the dish.  A sexy little kick! I had leftover marinara from the other day, but not quite enough, so I added the jarred stuff until I had a quart.  These are the brands I like to use, because they are the closest to homemade I've ever found.
Penne with Shrimp and Vodka Sauce

1 25-ounce jar marinara sauce, or about a quart of leftover homemade
3/4 cup vodka
3/4 cup heavy cream (no substitution)
4 dashes hot sauce (either Tabasco or Franks hot wing sauce)
1/4 teaspoon crushed red pepper
1/2 pound extra large or jumbo raw, deveined shrimp (about 18 shrimp)
3/4 cup grated Parmesan cheese
3/4 of a (1-lb) box penne pasta

Peel the shrimp and set aside.
Stir together the marinara and vodka and simmer on medium in a large open skillet until it reduces by one fourth.  This should only take about 15-20 minutes, depending on your stove.  When it gets close, start your water for the pasta.  Keep an eye on it and stir occasionally, sometimes it goes really quick.  Add the cream and heat through, then add the add the seasonings and taste the sauce.  It should have some spicy heat.
Add pasta to the water and set timer for ten minutes.  When there is 6 minutes left, add the shrimp to the sauce and cook for 5".  Stir in Parmesan cheese and cook 1" more.  Drain pasta and toss pasta with the sauce in the skillet.  
Serves 4.

Saturday, August 21, 2010

Make Ahead Blueberry Scones


Over time you'll see a lot of scone recipes here, of all different kinds and techniques.  I love sweet things in the morning, and what Mama likes, Mama makes.  Today I had blueberries in the fridge, and I know they will be out of season soon, so blueberries it is.  The recipe came from Cook's Illustrated issue number eighty-seven.  This is a good "make-ahead" recipe because after they are shaped and ready to bake, you can freeze them to take out and bake any morning you like.  I've done it many times.  This recipe is a bit more involved than most, but so worth it.  They are very delicious.  I've tried using this same recipe, but without the frozen butter and folding dough steps (more like most other scone recipes) and they came out unrecognizable to these.  Cook's Illustrated got it just right.

Blueberry Scones


2 sticks of butter, frozen
1 1/2 cups blueberries
1/2 cup milk
1/2 cup sour cream
2 cups flour, plus additional for work surface
1/2 cup sugar, plus 1 tablespoon for sprinkling
2 teaspoons baking powder
1/4 teaspoon baking soda
1/2 teaspoon salt
zest from 1/2 lemon


Adjust oven rack to middle position.  Preheat oven to 425 degrees.  Score and remove half of wrapper from each stick of frozen butter.  Grate frozen butter only down to the wrapper on both sticks.  A regular box cheese grater works great.   Immediately put grated butter back into the freezer.  Melt 2 tablespoons of the remaining butter, and save the remaining 6 for another use.


In a small bowl, whisk together the milk and sour cream.  Refrigerate until needed.  In a large bowl, mix together the flour, 1/2 cup sugar, baking powder, baking soda, salt, and lemon zest.  Add frozen butter and toss with fingers.


Add milk mixture and stir in until just combined.  Turn out onto a liberally floured surface and knead 6-8 times, adding flour as needed to prevent sticking (I use quite a bit).  Make sure your surface has plenty of flour on it, then pat or roll dough into a 12 inch square.
Fold in thirds like a letter, then fold that into thirds.  It will look like the photo below.
Transfer dough to a plate lightly dusted with flour and place in freezer 5 minutes (I only do this when it's hot out).
Transfer dough to a floured surface and roll into a 12 inch square again, then sprinkle blueberries evenly over the surface and press down on them with your hand.
Roll this up jelly-roll style, forming a tight log.  Press log into a 12x4 inch rectangle.  Using a sharp flour knife, cut like so.
Place scones on a cookie sheet, brush with melted butter, sprinkle with sugar and bake 18-25 minutes until tops and bottoms are golden brown.  Let cool 10 minutes and enjoy!
If you're baking frozen scones, heat oven to 375 degrees and bake 25-30 minutes.

Friday, August 20, 2010

Carrot Cake

Life is short - eat cake for breakfast!
I made this cake today, for a friend who requested the recipe, and it's a good thing I did, because the item I WAS going to tell you about, turned out to be a disaster from, well, you know where.   Spinach Gnocchi.  I can't even say it without choking on it...gn-yacck-i.  When I went to boil the first round, the boiling water blasted them to smithereens, like the space shuttle Challenger leaving the atmosphere.  Big mess. Start over.  Did not lose my head and salvaged the rest, but alas, after all that, they were just okay at best.  Actually, they gagged me.  And I'm only going to share recipes that get people EXCITED...like YES, Give me some of that NOW!!!  So, thank goodness for this carrot cake!  It qualifies.

I can't take any credit for the recipe.  It is (pretty much) straight from the Silver Palate Cookbook (1982).  I've made it probably 50 times in the previous 25 years.  Anyone who knows me, knows I love dessert for breakfast, and sometimes I make this cake and freeze pieces of it, just so I can have them in the morning.  Day after day....until my pants don't fit anymore.   It is a dense, moist cake, full of things to wrap your taste buds around.
If you make it in layers, there is just a little too much batter for 9" rounds.  Withhold a cup.  Also, if it sighs in the middle, don't despair, just fill in the depression with the frosting.  No one will notice and it still always tastes GREAT.  This is Scott's favorite.

Carrot Cake

3 cups flour
3 cups sugar
1 teaspoon salt
1 tablespoon baking soda
1 tablespoon ground cinnamon
1 1/2 cups vegetable oil
4 large eggs, lightly beaten
1 tablespoon vanilla
1 1/2 cups chopped walnuts
1 1/2 cups shredded coconut
1 1/3 cups pureed cooked carrots
3/4 cup drained crushed pineapple (squeezed dry)
Cream Cheese Frosting (recipe follows)

Preheat oven to 350 degrees.  Grease a 13x9 inch pan.  You may use 2 9" rounds, but you must then line bottom of pans with wax paper, and then butter them.
Sift dry ingredients into a large bowl.  Add oil, eggs and vanilla.  Beat well (wooden spoon is fine).  Add walnuts, carrots and pineapple.  Pour batter into the prepared pans.  Set on the middle rack of the oven and bake for 40 minutes, then start checking every 5 minutes until it springs back when touched and a cake tester inserted into the middle comes out clean.
Cool on a cake rack for 3 hours.  Frost as desired with Cream Cheese Frosting.

Cream Cheese Frosting

12 ounces cream cheese, softened 
6 tablespoons butter, softened
1 box confectioner's sugar
1 teaspoon vanilla extract

Cream together the cheese and butter in a mixing bowl.  Slowly beat in the confectioner's sugar.  Stir in vanilla.
Frost the cake!


Thursday, August 19, 2010

Easy, Authentic Marinara From Fresh Garden Tomatoes

It's about that time.  If you grow tomatoes, you've probably already made salsa, bruschetta, BLT's, more salads than you can remember, and eaten them like apples.  If you still have beautiful tomatoes around, try this sauce.  It only works with super-ripe, juicy garden tomatoes.  It doesn't require simmering all day, and has an unmistakable fresh taste that cannot be duplicated by canned tomatoes (although I also love marinara made with canned tomatoes in the off-season).  It is a simple dish that's a real treat.

Fresh Tomato Marinara


1 medium Spanish onion, chopped
3 fresh garlic cloves, minced
1/3 cup olive oil
3 pounds super-ripe fresh garden tomatoes (about 10-12 medium)
1/2 cup fresh basil, chopped
1/2 cup fresh Italian parsley, chopped
3/4 teaspoon salt
1 teaspoon freshly ground black pepper
1 teaspoon dried oregano


This first step is the most important.  Heat olive oil in a large skillet on your lowest stove setting. Add onion and garlic and cook VERY LOW and slowly, until they soften and yellow.  Garlic browns and burns very easily and if it happens, it will ruin the dish.  On my stove it takes about 15" on low to get the garlic right.
In the meantime, with a serrated knife, core, and then chop the tomatoes up into approx 1" pieces, saving all the juice.  You might want to do this on a cookie sheet, so you don't lose the juice.
When the garlic and onion are ready, add the tomatoes and all other ingredients, raise heat and bring to a simmer.  It will look like this:
wish you could smell this
Let simmer until it reduces by about 1/3, or to a consistency you like.  I like it quite thickened, so I simmer it about an hour.  Serve with your favorite pasta.  If you have leftovers, save them to turn into vodka sauce.  I'll post that recipe soon.  Serves 4.

Checkerboard Cookies

Why am I baking cookies when it's sweltering out?  Because they're SO GOOD, that's why!
These are my favorite cookies, and they're the ones I crave, no matter what the season.  Scott says one of three things when he's eating; "I love food," "I eat like a king," or "WHOA."   These rate as "WHOA," because it's not just that they're cute;  they taste really good.  I came up with this recipe after seeing some checkerboard cookie dough in the Williams Sonoma catalog.  They wanted $38 for it.  Um, I don't think so. You can make these for about $4.50.

If you glance at the recipe and think "I'm not going through those steps" then do this:  Make the dough up to the point where you beat the cocoa into half of it.  The recipe is easy. Then roll each half into equal length 1" diameter ropes.  Press the two ropes together and roll lightly again.  Slice and bake.  They won't be checkerboard, but they'll be delicious black and white cookies!

Checkerboard Cookies


Makes about 4 dozen cookies
3 1/2 cups flour
1/2 baking powder
3/4 teaspoon salt
3 sticks butter (REAL butter, no substitutions) softened
1 cup sugar
1 1/2 teaspoons vanilla extract
1/2 teaspoon almond extract
1 large egg, lightly beaten
1/3 cup cocoa

Preheat oven to 350 degrees.  In a medium bowl, stir together flour, baking powder and salt.  In a large bowl,   with a hand mixer, beat together butter, sugar and extracts until fluffy, about 2 minutes.  Add egg and beat well.  Add flour mixture and mix on low until just combined.  With your hands, pat dough into a ball.  Cut in half and remove half to the fridge.  To the other half, beat in the cocoa until mixed thoroughly.  Now cut the chocolate dough and the white dough in half, so you have two equal balls of EACH flavor.  Roll each ball out into equal length & diameter logs, about 18" long.  Then, pat the top flat. I use the flat of a butcher knife to do this.  Then tap the sides flat, so you have 4 square logs, like so:
You may cut these in half to make them easier to work with, if you like.
Then place a chocolate and white next to each other and lightly press together and pat the top flat, like so:
Next stack one set on the other, with alternating flavors, like so:
Now the easy part.  Slice into about 1/3" slices and bake for 10-11 minutes, until golden around the edges.
Abby is hoping I'll drop one on the floor.

Wednesday, August 18, 2010

Sausage Stuffed Zucchini with Pesto Campanelli

My mother used to make this stuffed zucchini for us when I was growing up.  We had a garden, and as anyone who grows zucchini knows, there is always more than enough.  Here is a picture of me, circa 1976,  with my brother Tim, and dog Sheba, and a huge bat of a zucchini.
There was never a recipe written down, we just always made this.  I had to stop and think as I was throwing it together, to measure, so I could accurately relay it to you. 


The pesto is another story.  When pesto was all the rage, in the 80's and early 90's, I didn't like it.  It was too strong for my tastes and I'm not a huge fan of pine nuts.  But this year, my basil plants were gorgeous,
So I decided to give it a shot, tweaking recipes and substituting toasted slivered almonds for the pine nuts.  I made it in a blender and it worked fine and was delicious!  And it makes your house smell divine.  Audrey and I now love this pesto, and have made several batches, freezing cupfuls in ziploc bags for a future treat to break the winter doldrums.  The pesto pasta goes perfectly with the stuffed zucchini, but you will have to make the pesto earlier in the day, or thaw out previously frozen pesto because you won't have time to make it once you put the zucchini in the oven.


Sausage Stuffed Zucchini


2 medium (approx 8" long) zucchini
1 (12 ounce) Jones Original pork sausage (found in your grocer's freezer section, log shaped) - thawed
3/4 cup Italian seasoned breadcrumbs
1/2 cup grated Parmesan cheese
1 cup of reserved pulp of zucchini, chopped small
1 egg


Preheat oven to 375 degrees. Lightly oil a 13x9 in baking dish.  Cut zucchini in half, then in half again, lengthwise, so you have 8 "boats."  With a spoon, scoop out the fleshy middle of the zucchini, only going down about 1/2 inch.  You want to leave the good flesh of the zucchini.  Take the pulp, and chop it up into 1/4 inch pieces, reserving a cup of this for the stuffing.  Place the thawed sausage in a large bowl with the breadcrumbs, cheese, egg and pulp. Mix together with your hand until thoroughly combined.  Place zucchini boats in a single layer in the prepared dish.  Divide the stuffing equally among the boats, mounding stuffing nicely.  Sprinkle with Parmesan cheese.  Bake for 35-40 minutes or until stuffing looks nicely browned.


Toasted Almond Pesto Campanelli


1 1/2 cups fresh basil leaves
1/2 cup slivered almonds, toasted lightly brown
2 cloves garlic
1/2 cup grated Parmesan cheese
1/2 cup olive oil 
salt and pepper
1/2 pound Barilla Campanelli pasta


You may use a food processor by pulsing first 4 ingredients, then adding olive oil in a stream until it is all blended fine.  If you are using a blender, stuff some basil leaves way down, then add nuts and pulse.  You may have to stop the blender and take the handle of a wooden spoon to jam basil down towards the blades.  After doing that a couple times, it usually takes off blending in earnest.  Add garlic cloves and Parmesan, pulsing a couple times, then pour olive oil into blender in a stream while blending.  Store 1 cup in a covered container for the Campanelli, and freeze the rest in a ziploc bag for a later use.


While zucchini is baking, set a large pot of salted water on to boil.  Add a few drops of olive oil to the water.  Cook pasta according to package directions, before straining, reserve 1/4 cup of the boiling water and add to the pesto, to loosen it up, so it will coat the pasta well.  Toss pasta with the pesto and serve immediately with the zucchini.