My Motto

May the muffin rise to greet you, may your friends be always at your door, and until we meet again, warm a single-malt in the palm of your hand and make something homemade for someone you love.

Wednesday, September 29, 2010

Rustic Apple Pie


"Good apple pies are a considerable part of our domestic happiness."


~Jane Austen
I admit it, there have been times in my life that pie crust has made me cry. 

I can't effing do it, alright?! Just leave me alone.
Most often it was because I was rushing, and pie crust generally needs to be finessed;  romanced almost, like a high strung date.  Too much water and it gets sticky, creating a tough crust (Amy Winehouse), too little water and it is dry and crumbly (Jessica Simpson), making it difficult to roll out and work with.
My mother taught me how to make pie crust and pies at a young age.   She was a patient teacher and gave me plenty of latitude to take risks and learn from my mistakes.  One of my early flops was an apple pie that I was attempting completely on my own.  I learned from her to brush the top crust with milk, then sprinkle it with sugar before you bake it.  Well, I went into the pantry and grabbed a 5-lb bag of sugar, or so I thought.  I proceeded to happily and liberally sprinkle my beautiful pie and it’s decoratively fluted edge with SALT. 
My pie, my beautiful pie....
Everyone was nice about it.  We still ate it.  It wasn’t too bad actually.  Of course, now it would be haute cuisine, like fleur de sel caramels.  
Back then it was just weird.  But I still remember my dad laughing about it.  Classic.  And hey!  I never made that mistake again!
This is a quick, frustration-free pie.  All the goodness, none of the fuss (Megan Fox). I first saw a pie done this way in Martha Stewart's Quick Cook (1983).  
Only one crust to roll, and it doesn't have to be perfectly round, in fact, it is more charming if it has an uneven edge.
It comes together in half the time and you don't even need a pie plate if you don't have one.  You could make it in a cast iron pan.  

Rustic Apple Pie

Crust:
1 1/2 cups flour
3/4 teaspoon salt
1 tablespoon sugar
1/2 cup shortening
5-7 tablespoons ice water

Filling:

4 large tart apples (McCoun, Cortland, McIntosh or Granny Smith) peeled, cored, and sliced.
1/2 cup sugar
1 teaspoon cinnamon
1 tablespoon butter

To make the crust:  In a medium bowl, stir together the flour, salt and sugar.  With a pastry blender, or two butter knives, cut in the shortening until pieces are the size of small peas.  With a fork, start tossing the flour while sprinkling on the ice water, one tablespoon at a time.  Add water until dough is just moist enough to hold together well.  Form dough into a ball.  Place on a well-floured surface.  Flatten ball slightly and smooth the edges.  Using a rolling pin, roll into a circle, roughly 12 inches in diameter.
Fit pastry circle into a pie plate, or 10-inch cast iron pan.  Pile sliced apples onto crust.  
Sprinkle with sugar and spices, dot with butter, and fold the pastry edges over the apples.
Bake for 45-55 minutes in a preheated 375 degree oven, until apple filling is bubbly and crust is golden.  Cool slightly and slide the pie out of the dish onto a serving plate.  Before serving, dust with confectioner's sugar.  Serve with whipped cream or ice cream.

Saturday, September 25, 2010

Chocolate Mousse Cake

"I want to have a good body, but not as much as I want dessert."
~Jason Love

When I was 9,  we went to my grandmother’s house for dinner.  She lamented that she made chocolate mousse for dessert and it flopped.  In my 9 year old brain I pictured an actual moose made of chocolate.  
I'm made of chocolate and I may flop.
Kind of like when my mother would say she was going to a bridal or baby shower and I would picture a gang shower, which, to my horror, actually existed as I would find out that very Summer at girl scout camp.
Ok, so there are boy scouts.  Use your imagination.
Curtis turned 20 yesterday.  Even though he is attending college 17 hours away, we still celebrated his birthday here. It’s our way of keeping him close.  I thought this cake would be fitting, seeing as he lives in Zahm Hall, and moose pride runs deep there. Plus, he loves chocolate (don't worry Curt, I'll freeze a slice for you).
Photo of an actual moose, that Curtis himself took in New Hampshire
Ignats the Moose is the official mascot of Zahm. Legend has it, that in the 1970s, a few residents of Zahm Hall were on a trip in Canada when they came across a ski lodge that was closing. Ignatus, the owner of the lodge gave the men a mounted moose's head for free. They strapped the animal to the roof of their car and drove back to University of Notre Dame. 
This would have been perfect if it didn't include the butt and it was actually a moose.
The dorm immediately accepted its new mascot and it was named "Ignats" in honor of its former owner. Although Zahm residents are referred to as "Zahmbies" and their football team is named The Rabid Bats, the moose is the official symbol of Zahm. 
Ignats
Soon after the new mascot arrived, Ignats was brought to Notre Dame's Basketball games. A pattern developed when Ignats was brought to a game, the team would win. However, one game, one of the ushers refused to allow Ignats into the arena and the Irish lost the game that night. The basketball coach at the time, Richard "Digger" Phelps, found out about the incident, and made sure from then on that Ignats would be allowed in any basketball game. Today, Ignats is bolted to the basement wall of Zahm in order that Keenan Hall, Zahm's rival dorm, does not steal or vandalize the beloved mascot. 
This cake has history too, not as old as Ignats, but nearly.  It is adapted from a recipe I’ve had since 1984, when I subscribed to McCall’s Cooking School recipe cards during college.  Sort of like the Columbia House Records Club, but for food geeks. Twelve recipe cards with pictures would arrive in the mail once a month and if someone in the dump of an apartment complex I lived in didn’t steal them, I would teach myself all sorts of new cooking techniques.  This is my most treasured cake recipe.  Tried and true and always delicious.  We had a tradition for years in the '90's, where our friends would make buffalo wings and we would bring this cake.  Good times!

Chocolate Mousse Cake


Cake Layers:
4 ounces unsweetened chocolate
1/2 cup hot water
1/2 cup granulated sugar
2 cups sifted flour 
1 teaspoon baking soda
1 teaspoon salt
1/2 cup softened butter
1/4 cup vegetable oil
1 1/4 cups sugar
1 teaspoon vanilla extract
3 eggs
2/3 cup milk


Mousse Frosting and Filling:
3 cups heavy cream, chilled
1 1/2 cups confectioner's sugar
1/2 cup unsweetened cocoa
1/8 teaspoon salt
2 teaspoons instant coffee or espresso powder
14 whole roasted almonds


In a glass bowl over a saucepan with simmering water (do not let bowl touch water) melt chocolate.  When melted, dip round end of almonds in chocolate and place on a piece of wax paper.  Set aside.  Stir 1/2 cup sugar into melted chocolate, then slowly stir in the very hot water, stirring constantly, until thoroughly combined.  Cool to lukewarm.  Sift flour with soda and salt.


Preheat oven to 350 degrees.  Grease and lightly flour two 9 by 1 1/2-inch round cake pans.  In a large bowl, beat butter until fluffy.  Gradually beat in sugar, adding alternately with oil, beating until light and fluffy, about 5 minutes.
Add vanilla, then eggs, one at a time, beating well after each addition, scraping down the sides of bowl.  At medium speed, add flour mixture alternately with milk.  Begin and end with flour.  With scraper, blend in chocolate.
Turn into pans. Bake 25 minutes, or until surface springs back when gently pressed with finger.  Careful not to overbake!  Cool 10 minutes. Loosen sides with knife.  Remove layers; cool on rack.  In medium bowl, combine heavy cream, confectioner's sugar, cocoa, salt and instant coffee granules.  Refrigerate 1/2 hour.  Beat with rotary beaters until stiff.  Refrigerate.  With long, thin bladed knife, split layers in half to make four.
Place layer, split side up on cake plate.  Spread with 2/3 cup mousse filling.  Repeat twice. Top with last layer, cut side down. Spread mousse on top and sides and if desired, fill a pastry bag with the remaining mousse and pipe on decorations.  Place almonds evenly around the top.  Serves 10.


Friday, September 24, 2010

Crab Stuffed Chicken

"Walk Straight My Son ~ As the Old Crab Said to the Young Crab" 
Irish Proverb
For this recipe, it is essential that  you use REAL snow crab for the stuffing.
I don't think I'm a snow crab, but I'm pretty!
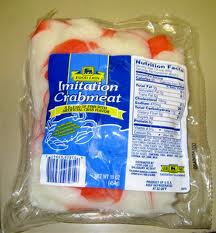
Whatever you do, don't cheap out and buy imitation crabmeat.  What is that stuff anyway?  Alright, I admit I've bought it and it's not too bad chopped up and turned into seafood salad, but it would most definitely not do for this recipe.
Pretty sure I'm a mixture of halibut and red dye #40
Okay, I just threw this one in for fun.  You ever have one of those days?  Things started to go wrong around 9 a.m. when I was in the bathroom with my head upside-down, blow drying my hair and Scott (aka The Mister) who was supposed to be at work came in and scared the crab out of me. We don't have a land line and apparently my daughter was frantically calling my cell phone which was by now vibrating itself off my bedside table, where I left it. Geez!!! The Mister was not happy.  Apparently the world was going to explode if I did not get down to the high school and sign a permission slip RIGHT THAT SECOND.  One, I might add, that I had never been shown, nor knew existed.  It was all downhill from there.
This was me on Wednesday
This was a great dinner.  The Mister loved it.  Said he liked the chicken better than, say, stuffed sole or flounder.  The crab stuffing is really delicious.  For the bread crumbs, I had a stale French roll that I chopped up and threw in the blender.  You can use any bread you have around, just take it out and let it dry out for a little while before you blend it.  Packaged breadcrumbs are fine too, but not the overly-seasoned kind.  Crab is delicate and you don't want to overpower it.  This recipe was one I copied out of the Marblehead Cooks cookbook I found at the lakehouse in July.  I've been working my way through them and so far, they've all been winners.

Crab Stuffed Chicken


4 boneless chicken breasts
Crabmeat stuffing:
12 ounces snow crab
2 minced shallots
1 stick butter
2 cups bread crumbs
2 cups sherry

Sauce:
1 1/2 cups white wine
3 cups heavy cream
Fresh dill and fresh parsley to equal ¼ cup
Salt and pepper to taste

Saute shallots in butter, add sherry and reduce by half.  Add crab and cook for 2-3 minutes.  Add bread crumbs to bind together and season to taste with salt, pepper and parsley.

Cut chicken breasts in half and pound until thin.  Place stuffing on one end of chicken breast and roll up, tucking in ends.  Dredge in flour.  Heat a large nonstick sauté pan on medium high and melt 1 T butter in 2 T oil.  Brown chicken rolls.  Place the browned chicken in a 13x9 inch dish.

In the same sauté pan you used to brown the chicken, add wine and heavy cream, add 1 T. fresh dill; reduce this until it has thickened by half and season to taste with the salt, pepper and herbs.

Pour over the chicken and bake at 350 degrees for 25-30 minutes.  Serves 8.

Wednesday, September 22, 2010

Silver White Cake Surprise

"Let them eat cake" 
~Marie Antoinette
I didn't know what to call this cake.  I actually considered "My White Cake Ate Your Chocolate Cake," but Audrey gave me 'the look.'  The "don't be stupid, Mom" look.  When she's right, she's right.

I've been making Silver White Cake since I was a teenager.  It's a great 'from scratch' recipe because you simply measure everything but the egg whites into a bowl,  beat together, add whites, beat some more, and your done.  Really easy, and always out moist and delicious with a nice tender crumb. 
 Keith's birthday is today, so this was for him.  He is now 22, the same age I was when I had him.  This amazing young man was once my baby, when I wasn't much more than one.  Hard for me to believe. It went by so fast.

He's a vanilla guy, and loves this cake.  He told me at least 4 times today "That was great cake, Mom."  We love to please them, don't we? 
The original Silver White Cake recipe came from Betty Crocker's Cake Decorating, published in 1984.  I increased the recipe by 50% because I prefer a tall cake, and added the chocolate layer, so it wasn't straight up wedding cake.

Silver White Cake Surprise

3 1/3 cups all purpose flour
2 1/2 cups sugar
1 cup shortening
1 3/4 cups plus 2 tablespoons milk
5 1/4 teaspoons baking powder
1 1/2 teaspoons salt
1 teaspoon almond extract
1 teaspoon vanilla
7 jumbo egg whites
1/3 cup cocoa (for one layer only)

Preheat oven to 325 degrees.  Grease and flour 3 9-inch cake pans.  Beat flour, sugar, shortening, milk, baking powder, salt, almond and vanilla extracts in large bowl on medium speed, scraping bowl constantly, until blended. Beat on high, scraping bowl occasionally, 2 minutes.  Beat in egg whites, scraping bowl occasionally, 2 minutes.  Pour one third of batter into one prepared 9" pan, one third into another prepared 9" pan and then beat the cocoa into the remaining batter and pour that into the last 9" pan.
Start checking them at 25 minutes.  Be careful not to over bake.  A cake is done when you touch the top and it springs back.  Cool for 10 minutes, then turn one white cake onto cake plate, and the other two onto cooling racks.  

Creamy White Frosting

2 (1lb) boxes Confectioner's sugar
1 cup butter
1 cup Crisco
1 teaspoon almond extract
1 teaspoon vanilla extract
1/2 cup milk (might need a little more)

Beat ingredients on medium speed until smooth and of spreading consistency.  If necessary, beat in additional milk, one teaspoon at a time.

Tuesday, September 21, 2010

Hearty Sausage Vegetable Soup

"To feel safe and warm on a cold wet night, all you really need is soup."
~Laurie Colwin
I'm not a Summer girl, despite the fact that I live down the street from the beach.  I can't stand the heat, yet don't want to get out of the kitchen, so it's a conundrum.  Fall blows the humidity away, replacing it with crisp air, cool breezes and good hair days.  It is hard to imagine a place more beautiful than New England in the Fall.  Even the weeds turn color and look pretty.  I love the soups, stews, roasts, breads, crisps and pies that the season inspires me to yield.
The bones of this soup came from my friend, Fran.  This is no anemic soup.  You know, the kind that makes you want to sneak off to your local pizza parlor after dinner, so you munch a slice and feel like you ate something.  The broth is rich and loaded with hearty vegetables.  Now is the perfect time to make it, while you can still find good local zucchini and garden tomatoes.  My favorite sausage to use is hot fennel garlic Italian sausage.  As the soup simmers, the sausage imposes it's seasonings on the broth, adding a complexity you can't find in a can.  All you need is some crusty bread to round out a great Fall meal.

Hearty Sausage Vegetable Soup

1 pound hot Italian sausage
1 large onion, chopped
2 cloves garlic, run through a garlic press (or minced)
2 medium garden tomatoes, chopped
1 carrot, sliced
1 medium zucchini, sliced
1/2 small head of cabbage, chopped
1/2 green pepper, chopped
1 (15 ounce) can tomato sauce
2 (10 ounce) cans beef broth
2 (10 ounce) cans chicken broth
1 1/4 cups red wine (or water)
1 bay leaf
1 tablespoon fresh basil, chopped (about 5 leaves)
1/4 cup fresh parsley, chopped
1 cup uncooked Ronzoni small egg bows (or other small pasta)
Parmesan cheese for sprinkling at serving time

Remove sausage from casings.  Brown in a large heavy pan or Dutch oven and drain.  Add onions and garlic; cook and stir until tender, being careful not to burn the garlic.  Add all ingredients except pasta and Parmesan cheese.  Cover and simmer 30 minutes, add pasta and simmer 20 minutes longer, or until pasta is tender.  Season to taste with salt and pepper.  Serve with Parmesan cheese.  Serves 6.


Saturday, September 18, 2010

Turkey Saltimbocca

It was difficult to believe how delicious this was, considering it's simplicity.  This was another fabulous recipe from the BHG Ultimate Italian publication (available now).  The only thing I did differently was substitute Sherry for the white wine, since I didn't have any white wine in the house.  It was so good, I wouldn't do it differently next time.  And there WILL be a next time, and a next, and a next.....  Start to finish, it only took 20 minutes and it was incredibly simple.  Great for mid-week, but so good I would serve it to company.  In fact, this year I have "Main Dish" for our annual Christmas Eve progressive dinner and I may well just make this (yes, I think about these things this far in advance.....so shoot me!).

Turkey Saltimbocca


1/4 cup flour
1/2 teaspoon salt
1/2 teaspoon black pepper
4 turkey cutlets (about 3/4 pound)
2 tablespoons vegetable oil
4 slices deli ham
4 slices Swiss cheese
1/4 cup Sherry (or dry white wine)
1/4 cup chicken broth
2 tablespoons snipped fresh Italian parsley (optional)


In a shallow dish, combine flour, salt and pepper.  Place each turkey cutlet between two pieces of plastic wrap.  Using flat side meat mallet, pound turkey lightly, working from center to edges, to flatten slightly.  Remove plastic wrap and dredge cutlets in flour mixture.  Shake off excess.


In an extra large skillet, heat oil over medium high heat.  Add cutlets; cook 2-4 minutes or until brown on bottom.  Turn cutlets over; top each with a folded slice of ham and 1 slice of the cheese.  Add Sherry and broth.  Cook about 5 minutes until cheese melts and sauce thickens.


Transfer cutlets to a serving platter.  Spoon pan drippings over cutlets.  If desired, garnish with parsley.  Makes 4 servings.

Thursday, September 16, 2010

Coffee Field

Never work before breakfast; if you have to work before breakfast, eat your breakfast first.                
~ Josh Billings
You know, life is funny.  I started this blog in July after I got laid off from the office job I'd held for 8 years.  Well, last week I went to one of my favorite places downtown to ask if they wanted to submit a recipe for Guest Recipe Sunday here on the blog.  Instead they offered me a job!  It's 180 degrees from what I was doing, but it suits my personality much better.  It would not have been listed in the paper, I wasn't looking for it, and I never would have gone looking for if I had not gotten laid off, so basically, this blog got me a job.  I have to tell you I was nervous starting something new (since there is already so much new in my life), but am already settled in and excited about working.  The thing is, I will be surrounded by extraordinary looking baked goodies all day, but if I have a piece of this coffee cake before I go in, maybe I won't be tempted to do a swan dive into the muffin display.
Mmmm, can't you just taste it?
This is my most used recipe.  Since I developed it about 6 years ago, I've made it at least 50 times.  Definitely on my top 10 list of favorite breakfast foods.  It used to frustrate me when I baked one (Bundt cake size) and it would be gone in just hours so I came up with a recipe that worked in a quarter sheet cake pan.

There's a story behind the name.  I have copies of the recipe at home, because people have requested it so often, but the title is "Margaret's Humongous Coffee Cake."  When my son was 18, one of his friends received a week rental of a house on Martha's Vineyard (graduation present) and invited Curtis and at least 6 other guys (and I actually let him go!).  I made this to send with them and the boys said "This isn't a coffee cake, it's a coffee FIELD!"  And that is what we've called it ever since.  
After it cools, I cut it up into individual serving pieces, wrap them in plastic wrap, and freeze them.  It's our go-to food for breakfast and snacks on the run.  One of my sons even prefers it in its frozen state.  The other one loves to bring it to the airport when he travels.  Personally, I pack a few hunks whenever I travel, so I don't have to eat some dismal hotel Continental breakfast, because it's bad enough if I can't find a decent cup of coffee, you know what I mean?  At least I can have coffee cake!

Coffee Field

1 pound salted butter, (2 1/2 sticks of it softened and 1 1/2 sticks left cold)
3 cups chopped walnuts
1 tablespoon plus 2 teaspoons cinnamon
1 cup brown sugar
1 cup flour(for topping)
6 cups flour (for cake)
3 cups sugar
6 eggs
3 teaspoons vanilla
3 teaspoons baking powder
3 teaspoons baking soda
1 teaspoon salt
2 (16 ounce) cartons of sour cream

Preheat oven to 350 degrees.  Grease 1/4 sheet cake pan (12x15 inches).

You will need 3 mixing bowls.  first, prepare the topping.  In one bowl, mix the walnuts with cinnamon and brown sugar.  In another bowl, cut the 1 1/2 sticks of cold butter into the 1 cup of flour until the pieces are the size of peas.  Next, add 2 1/4 cups of the nuts mixture to the flour/butter mixture and use your fingers to smash it together until it is nice and crumbly.  Set aside.

In a large bowl, cream the remaining butter with 3 cups of sugar and vanilla.  Add eggs, one at a time, mixing after each.  Combine flour with baking soda, baking powder and salt.  Add to butter mixture, alternately with the sour cream, beating well after each addition.

Spread half the cake patter in the pan.  Sprinkle what is left of the brown sugar-nut mixture over the batter.  Add the remaining batter by spoonfuls and spread evenly over the nut mixture.  Sprinkle the crumb topping evenly over the batter.  Bake 1 hour, or until a cake tester inserted in the middle comes out clean.  Depending on your oven and weather conditions, it may take 5 or 10 mins more.  

Tuesday, September 14, 2010

Chicken Fried Rib Eye

I just hate health food.  ~ Julia Child
I have always wanted to make this.  Being a traditionally Southern dish, I didn't have much exposure to it.  You rarely find it on menus in the Northeast.  In fact, I can hardly say it without adding the Southern drawl "chicken-friiiiiied."  Bandera and Lamesa Texas, each claim to be the birthplace of the dish.  I saw the Neelys whip it up on the Food Network last month and they got my mouth watering!  My recipe is a tweaked version  of theirs.  While theirs called for cube steaks pounded thin, I used beef rib-eye steaks that were about 1/3 of an inch thick and made a bit more gravy with extra kick.  

Weeknights are busy here.  The girl plays field hockey and if she has a game, we're not walking in until 6 or 7, so I need something I can whip up quickly. Steak is one of my family's favorite things and I didn't think it was possible to prefer it more than nice, juicy, and simply grilled. But I was wrong. Start to finish, this meal was done in less than 30 minutes, and it was AMAZING. A unanimous opinion I might add.  These three Yankees LOVE chicken fried steak!  It's in the rotation now.

Chicken Fried Rib Eye

1/2 cup vegetable oil
4 thin sliced beef rib-eye steaks (1/4 to 1/3 inch thick)
1 1/2 cups flour
3/4 teaspoon salt
freshly ground black pepper
1/2 teaspoon cayenne pepper
1/4 teaspoon paprika
3 eggs, beaten
2 cups milk
1/2 teaspoon onion powder
2 cups milk (I used 1% and gravy came out phenomenal)

Heat a large skillet over medium-high heat.  Set oven to 150 degrees. Add oil and let it get hot. Oil is heated when you drop a little flour in and the oil spits.

Mix the flour, salt, pepper, cayenne and paprika together and pour onto a plate.  Beat the eggs in a shallow bowl.  Dredge the steaks in flour, then drag through the egg, then back into flour to coat both sides again.
Reserve a 1/4 cup of the flour mixture.  

Carefully add steaks to skillet in a single layer.  Cook until golden brown, 4-6 minutes on each side.  When finished, place on a cookie sheet lined with paper towels. Hold in warm oven until all the steaks are done.

When all the steaks have been cooked, pour off all but 3 tablespoons of the cooking oil and lower the heat.  Add the reserved flour mixture to the oil with a whisk, stirring to create a paste.  Cook, stirring, one minute.  Slowly start adding the milk while whisking.  Season the gravy with salt, pepper and onion powder.  Let cook until thickened.  Pour gravy over steak and garnish with fresh snipped chives.


Sunday, September 12, 2010

Chocolate Cannoli

Forget Love - I'd rather fall in chocolate!
Sandra Dykes
The first cannoli I ever had was at Villa Francesca in the North End of Boston. It was Fall of 1984, and I was a freshman in college.  The North End, which is considered Boston's Little Italy, is a small (1/3 of a square mile) neighborhood, cut off from the rest of the city by an interstate.  I lived in the Back Bay, but the North End was warmer, homier, and reminded me a little of Brooklyn.  Down Hanover Street, there was one small shop after another with windows full of Italian pastries or cheeses.  Fascinated, I stopped in one shop and watched as an artisan made beautiful, miniature, realistic looking fruit out of marzipan.
Inside, Villa Francesca was like no other restaurant I had ever been to.  It was narrow, and the walls were bare brick, with little round tables draped with white cloth.  It was charming with an air of romance, like a movie set from the '40's, where you might find Bogey and Bacall, or maybe Al Capone (no wait, that's Chicago). Billy Joel's "Scenes from an Italian Restaurant" played in my head.  The food was amazing, the best I'd ever had up to that time.  The only thing missing was a hot date, (I was with my family-no offense, Mom) preferably a ringer for Oliver Martinez.
My hot date..also born in '66.  It was a good year.
A waiter approached our table wheeling  a silver cart topped with a pyramid of fresh cannoli shells.  Taking a big white pastry bag, he filled the shells for us.  Wow!  I was hooked on their cool, creamy goodness.  I brought 4 back to my dorm and guarded them with my life.  Breakfast, lunch, dinner and dessert. When I saw the recipe for chocolate cannoli in the recent BHG Ultimate Italian publication, I had to make them.

I was fortunate in that my local market bakery was willing to sell me some empty shells, and they were GOOD. If you can get your hands on some shells, then putting the cannoli together is very easy.  It took me ten minutes. The publication includes a recipe for homemade chocolate shells, but I did not want to share that with you without trying it out first, and I need to buy some cannoli cylinders before I can attempt them.  

Chocolate Cannoli

1 15-ounce carton ricotta cheese
1/4 cup granulated sugar
1 rounded tablespoon cocoa powder
1 teaspoon vanilla
1/2 teaspoon finely shredded orange peel (not having an orange, I substituted 1/2 teaspoon Grand Marnier)
1/4 cup finely chopped dark or bittersweet chocolate.
10 cannoli shells (either packaged, or from your local baker

For the dark chocolate, I used Trader Joe's 85% cacao Chocolate Lover's chocolate.  Instead of chopping it, I grated it on a microplane zester.  In a medium bowl, stir together ricotta cheese, granulated sugar, cocoa powder, vanilla, and orange peel until almost smooth.  Fold in chocolate.  Cover; chill for 30 minutes.  Spoon filling into a pastry bag with a large open star tip. You can find inexpensive disposable bags at most grocery stores now, and certainly at craft stores.  I used a #32 tip.  If you don't have, or have never used a pastry bag,  don't sweat it.  Fill a ziploc bag, cut a corner off and fill them using that.  I've done it before.  Dip the ends of the cannoli in mini chocolate chips.  Still beautiful and tasty.  


Saturday, September 11, 2010

Colcannon


What I say is, if a man really likes potatoes, 
he must be a pretty decent sort of fellow.
A.A. Milne

Colcannon (a traditional Irish song)

Did you ever eat Colcannon, made from lovely pickled cream?


With the greens and scallions mingled like a picture in a dream.

Did you ever make a hole on top to hold the melting flake

Of the creamy, flavoured butter that your mother used to make?
 chorus:

Yes you did, so you did, so did he and so did I.


And the more I think about it sure the nearer I'm to cry.

Oh, wasn't it the happy days when troubles we had not,

And our mothers made Colcannon in the little skillet pot.

Someone recently asked me why I'm not showcasing more Irish recipes.  Have you tried Irish food? (Just kidding!) (Not really.) (Please don't kick me out of the clan.) Actually, I love Irish food, with the exception of blood pudding.  That's one of those things you need to grow up with for it to be comfort food.  As an Irish American, and a child of New England in the '70's, my idea of comfort food is a fluffernutter sandwich with a glass of coffee milk.  
Seriously, I do love Irish food, but if that's all this blog was about, I'd run out of material in about two months, since I don't actually live in Ireland.  I cook EVERYTHING I like, and the only things I don't like are okra and liver.  You'll see a little bit of everything sprinkled with Irish recipes here and there,  but no gumbo or Pâté, ever.

Colcannon is not something I grew up with.  I actually didn't start making it until I found the recipe in 2004 in the Gourmet Cookbook edited by Ruth Reichl, and this recipe is adapted from that one.  I brought it to a friends house and it was a hit.  The recipe has been requested several times.  It's a simple dish, and meant to be simple; inexpensive, satisfying and delicious.  Too much embellishment would make it something it's not supposed to be.  You could melt cheddar cheese over it, but then you would have turned it into Rumbledethumps (I'm not making this up), which is a Scottish dish. Not the same thing at all.  The shorter, cool nights of Fall are a great time to revisit this dish, after all, Saint Patrick's Day is just too long to wait!  


Colcannon

2 pounds white potatoes (about 8 medium)
3/4 to 1 cup milk
1 stick (8 tablespoons) butter
1 pound cabbage (one small head, like the one shown above)
1 small leek, washed well and sliced thinly (only the white part..about 1/2 cup) *optional
1 teaspoon salt
1/2 teaspoon pepper
1/2 teaspoon garlic powder
Peel and quarter potatoes.  Put in a 5-quart pot and cover with cold water.  Bring to a boil and cook until potatoes are tender, about 20-25 minutes.  Meanwhile melt 4 tablespoons of the butter and sauté the cabbage with the leeks, carefully, with letting them brown too much.  As soon as they are soft, add 1/2 cup milk and turn burner to its lowest setting, so they barely simmer.

When potatoes are tender, drain off the water and add the remaining butter, salt, pepper and garlic powder.  Beat with a hand mixer, adding just enough milk to whip them.  Now stir in the cabbage/leek mixture.  If that doesn't loosen it up enough, you can add a little more milk until they are the desired consistency.
*If you don't add leeks, then add 1/2 teaspoon onion powder.

Thursday, September 9, 2010

Pumpkin Mushroom Parmesan Risotto

"My way of joking is to tell the truth. it's the funniest joke in the world."
George Bernard Shaw
Let me tell you about the night I had.  We have two dogs.  One is a 10 year old Border Terrier named Tully, who is such a sweetie she doesn't even need a leash.  The other is a two year old Maltipoo named Abby, who is fluffy and adorable, but kind of a menace (we also have a parrot, but that's another story).  Right before bed the dogs are always brought outside one last time.
                       Border Terriers....hopefully not chasing skunks!
You know how dogs say hello to each other?  Yeah that.  Well Tully ran up to a huge skunk to check his calling card (naturally) and got sprayed point blank in the face, the poor thing.  Now that is just rude. Have you ever smelled skunk up close and personal?  It's so bad you can hardly breathe.  And it lingers...for-ev-er.  It's enough to get your shorts in a knot.  My job was to go online and find a recipe for "de-skunking solution."  Luckily, the Mister tackled the actual dirty job.  Where is Mike Rowe when you need him?  It worked surprisingly well and although you probably can still detect Eau-De-Skunk around here, it's better than last time (yes, rewind 11 years, different dog, Audrey's fifth birthday party, skunked dog running all through it..Murphy's Law, after all).  It can get a little nutty here.  I once hosted a traveling troupe of college singers for a weekend and one of them commented that our family was like a sitcom.  Is that good or bad?

But I digress...the risotto.

Not being a professional writer by trade, I cannot properly express my excitement over this dish.  It was savory, creamy, yet toothsome, and as comforting as an embrace.  I loved it!  Risotto is not difficult, you just have to stand there and stir it constantly for 20 minutes.  Tending it is the key to it's creamy richness, but you are amply rewarded for your efforts with this dish.  It can be a side dish, but it's also good enough to stand alone as a meatless meal.

This recipe was inspired by and adapted from the pumpkin risotto recipe in the Better Homes and Gardens Special Publication, Ultimate Italian, at newsstands now.  I recommend it if you happen across it, there are tons of great recipes and I plan on working my way through it.

Pumpkin Mushroom Parmesan Risotto


2 to 2 1/2 cups water
1 (14 ounce) can chicken broth
3 tablespoons butter
1 cup finely chopped onion
4 ounces baby bella mushrooms, diced small (pieces should equal 1 cup)
1 garlic clove, run through garlic press, or minced
2 cups uncooked arborio rice
1 cup dry white wine
1/4 to 1/2 teaspoon salt
Several grinds fresh black pepper
1/4 teaspoon dried thyme
1 cup canned pumpkin
1/2 cup Parmesan cheese


In a medium saucepan, bring water and broth to boil.  Set aside.  In a large saucepan, melt butter over medium heat.  Add onion, garlic and mushrooms.  Cook about 3 minutes or until onion is tender.  Add uncooked rice.  Cook and stir for 3 minutes until rice begins to brown.


Slowly add the wine to the rice mixture, stirring constantly.  Continue to cook and stir over medium heat until liquid is absorbed.  Stir in the seasonings.  Now you will begin to slowly add the hot chicken broth mixture.  Add to rice 1/2 cup at a time, slowly and stirring constantly.  When all the liquid is absorbed, add 1/2 cup more, again slowly and stirring constantly. Keep stirring until all the liquid is absorbed and the rice is slightly creamy and just tender (this should take about 20 minutes). Stir in pumpkin and Parmesan cheese; heat through.  Serve immediately.  Makes 4-6 servings.

Wednesday, September 8, 2010

Noodle Kugel

To all my Jewish friends & relatives:
L'Shanah Tovah! (Happy New Year)
Today is Rosh Hashanah, the Jewish New Year, a holiday where kugel is traditionally served.  I've always liked kugel since I first had it about 25 years, ago.  It's a comfort food for sure.
Kugel can be made either sweet or savory, and if you search, you can find endless variations, with fruits and vegetables added.
This sweet dairy noodle kugel is indulgently rich and has old fashioned flavor. The recipe was given to me by my Aunt Donna Dailey Silverberg.  It is a great brunch dish, when served with bagels and spreads.  I'm sure it's untraditional, but I found it sweet enough to serve as a dessert with fruit.
There was only 3 of us eating so I halved the recipe.  I hate waste and did not want to be eating it for days and then have to run a marathon to burn it off!

Noodle Kugel

1 pound extra wide egg noodles, cooked (Donna uses gluten free) and placed in a greased 13x9 inch pan
1/2 pound butter plus 4 tablespoons
6 eggs
12 ounces cream cheese
2 cups sugar
1 pint sour cream
1 teaspoon vanilla
1/4 teaspoon salt
1 1/2 cups crushed corn flakes (gluten free are available)


Preheat oven to 350 degrees.  Melt 1/2 pound butter.  Mix with softened cream cheese and sugar until smooth.   add eggs one at a time, then vanilla, salt, sour cream and mix until smooth.  Pour over noodles.

Melt the 4 tablespoons of butter and combine with crushed corn flakes.  Sprinkle evenly over noodle mixture.

Bake at 350 degrees for 1 hour.