My Motto

May the muffin rise to greet you, may your friends be always at your door, and until we meet again, warm a single-malt in the palm of your hand and make something homemade for someone you love.

Tuesday, May 17, 2011

Red Velvet Cake

"Maybe a slice of red velvet cake would help you focus."
~Welcome Home Roscoe Jenkins (2008)
In recent years, red velvet cake has had a resurgence.  I've seen it in the form of cupcakes, whoopie pies, cake balls, brownies, cheesecake; even Ben and Jerry just came out with the ice cream version!  This is not a bad thing, since I LOVE IT.   But almost every magazine you pick up has a recipe for it,  and I'm pretty sure you're yawning right now....yah, yah, yah, red velvet cake...tell us something we don't know.
Here's the thing.  Nearly 50 years ago, my mother was making this for our family's birthday cakes.  It has always been the family special cake.  I crave the distinct flavor.  There is cocoa in the recipe, but I wouldn't call it chocolate cake.  It is, well...red velvet cake, and has a unique flavor all it's own!  I made one for my oldest son's first birthday in 1989 and used green food coloring by mistake.  In my defense, the bottle was white with red letters (come on!!!).  Green velvet cake was just not the same.  
Even in the 90's I brought one to a Valentine's day party and most people there had never even heard of it.  My mother always made it with mock cream frosting, but I've changed it up a little, since I have inconsistent results with the mock cream recipe.  Last week I made this cake for my mother's birthday and it went way too fast.  The Mister said the cake and frosting were the best I'd ever done, so I wanted to preserve the recipe exactly as is,  since I did tweak it a little.
The 100th blog post milestone is around the corner and a nice surprise about the blog is that so many of my go-to recipes are here now that I no longer need to remember which cookbook, binder or file box the recipe is in.   It has become my own personal online cookbook, with side notes included!   My goal is to eventually post all of my very best recipes here.  It's convenient for me, provides a record of them for my family, and it's been fun to share them with you!  Your support and comments here and on Twitter and Facebook have been incredibly encouraging and always appreciated!  
Red Velvet Cake

2 cups sugar
2 sticks butter, room temperature
2 tablespoons vegetable oil
2 eggs
2 ounces red food coloring
2 tablespoons cocoa powder
2 ½ cups cake flour
1 teaspoon salt
1 cup buttermilk
1 teaspoon pure vanilla extract
½ teaspoon baking soda
1 tablespoon vinegar

Preheat oven to 350 degrees.  Grease and flour 3 (8 inch) round baking pans.  In a large mixing bowl, cream the sugar, oil and butter together.  Add the eggs one at a time, mixing well after each addition.  Sift together the flour, cocoa powder and salt.  Add flour mixture to butter mixture alternately with the buttermilk.  Add the food coloring and vanilla.  In a small bowl, combine baking soda and vinegar and add to the batter.  Equally divide batter in the 3 greased and floured round pans.  Bake for 20 to 25 minutes, or until middle of cake springs back when pressed with your finger.
Cool on racks for 10 minutes.  Turn one cake out onto serving platter.  Turn other two cakes onto cooling racks.  Cool completely before frosting.

Frosting:
1 1/2 sticks butter (3/4 cup), softened
½ cup Crisco
1/2 cup cream cheese
1 ½ pounds confectioner’s sugar
2 teaspoons pure vanilla extract
2 – 5 tablespoons milk (just enough to bring it to spreading consistency)
Cream the butter, Crisco and cream cheese.  Add half the confectioner’s sugar and vanilla and beat well.  Add the rest of the confectioner’s sugar, adding milk as needed to bring it to spreading consistency.


Wednesday, May 11, 2011

Egg Whites Cake


"Birthdays are nature's way of telling us to eat more cake."
~ Unknown

On Easter Sunday it was my duty to make the desserts for the family get-together.  I made lemon mousse and  a double size key lime pie, both of which called for many egg yolks, resulting a glut of leftover egg whites.   
Now, previously if I had leftover egg whites I would feed a couple to the dogs and huck the rest.  These days I'm trying very hard not to waste anything, so I was determined to use them up.  Now, I've heard people freeze egg whites, but I was skeptical, so I stumbled upon this post by David Lebovitz on ways to use up extra egg whites.  His post led me to this Estonian recipe for munavalgekook (egg white cake) which I adapted for my use and was surprised at how easy and DELICIOUS it was.
So easy and it has a nice moist crumb.  Perfect for a dollop of lemon mousse and some fresh strawberries.
Angel food cake is great, but a pain to make, and I wasn't in the mood after making two other desserts.  This cake whipped up easily and complimented the others nicely.  I'll make it again to have with berries or sliced peaches and whipped cream.  It makes great tea and coffee cake too.  A new go-to recipe for the archives, and no more wasted egg whites.

Egg Whites Cake (adapted from recipe posted on nami-nami)

6 large egg whites
1 1/3 cups sugar
1 cup all purpose flour
1 tablespoon cornstarch
1 teaspoon baking powder
1 stick of butter (1/2 cup) melted
1/4 teaspoon salt
1 teaspoon pure vanilla extract

Whisk the egg whites with vanilla and 2 tablespoons of sugar until thick and pale and very foamy. Mix the rest of the sugar with flour, cornstarch, salt and baking powder, then sift into the egg mixture and fold in gently.
Finally fold in cool melted butter.
Pour the batter into a buttered bundt-form and bake in a pre-heated 350 degree oven for 30-40 minutes. Test for doneness with a wooden toothpick.
Cool slightly before turning out of the cake tin.

Tuesday, May 3, 2011

Lazy Galumpkis

"Cauliflower is nothing but cabbage with a college education"
~Mark Twain
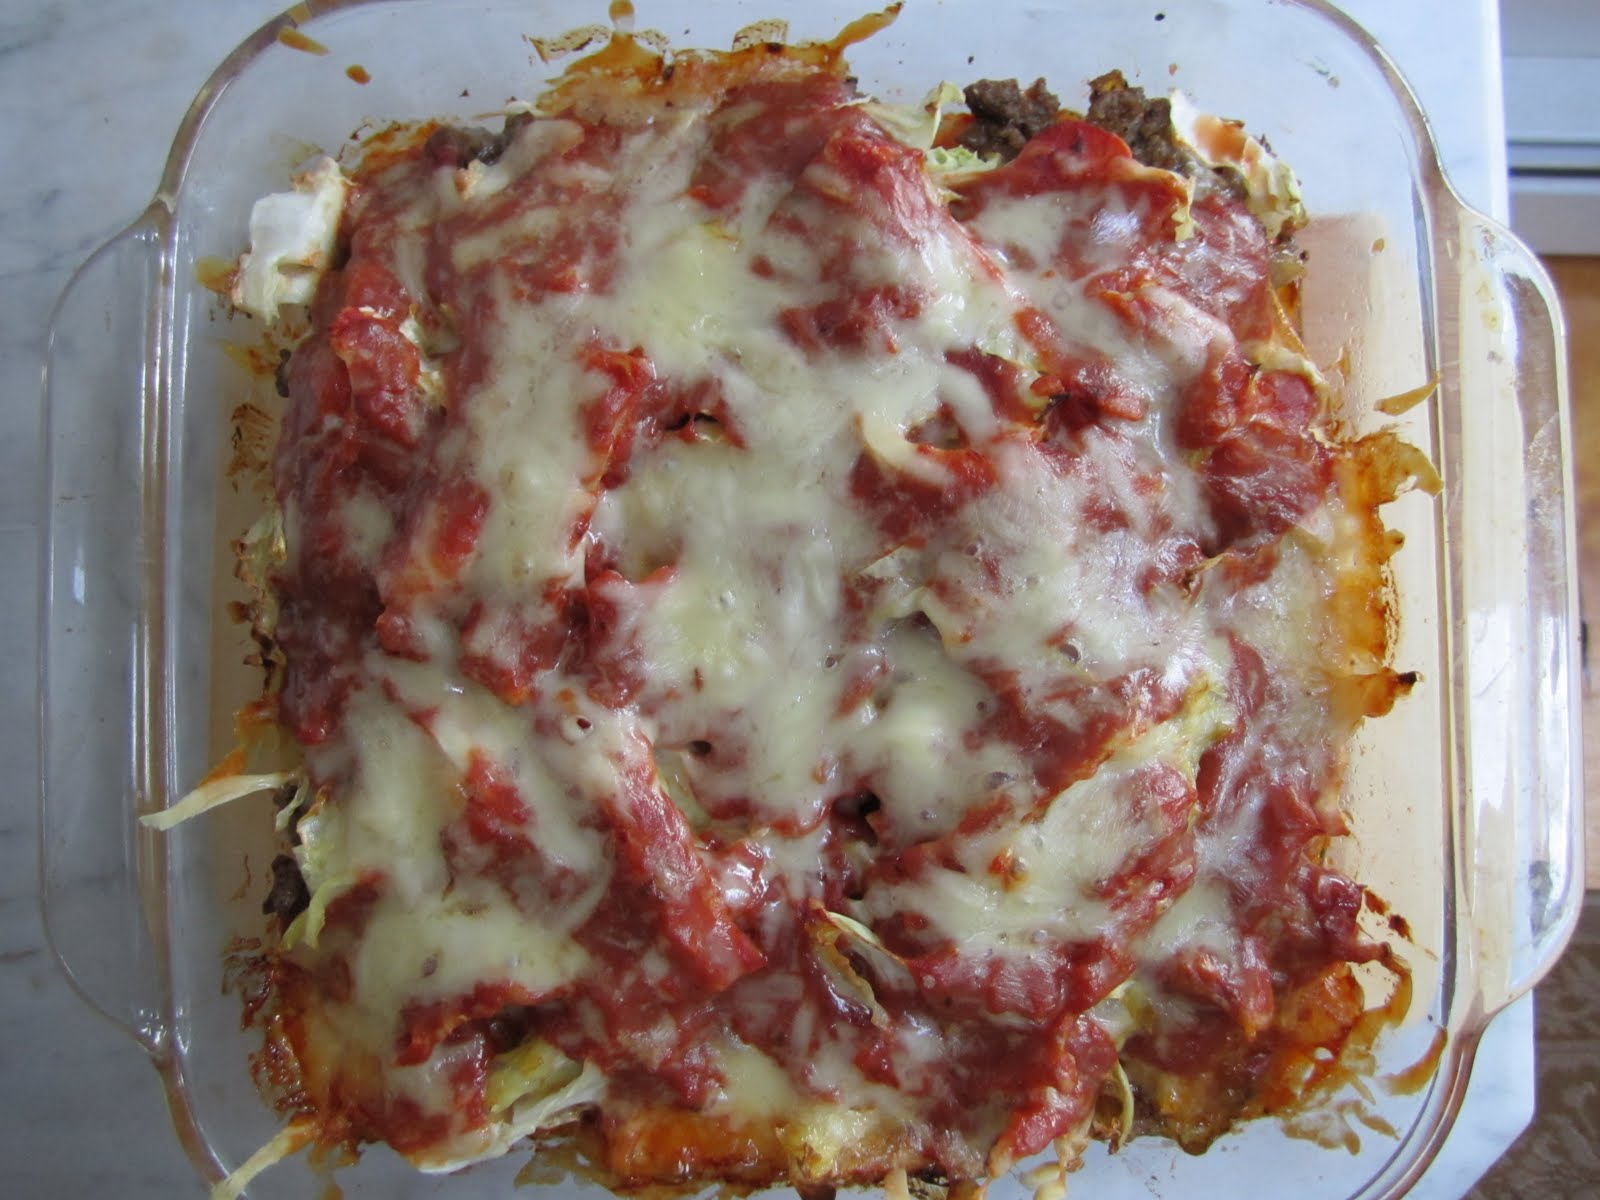
 Have you ever had galumkis?  You know, stuffed cabbage rolls.  My Aunt Catherine used to make them.  I remember being at her house for some event right when the baking dish came out of the oven.  They were so good, I decided right then to learn how to make them and that was many years ago.  They are a bit of a project though, and not for the faint of heart.  This dish, on the other hand, could not be easier and is really delicious.  We LOVE it!  In fact, I just said to The Mister that I actually like this dish BETTER than traditional galumpkis, and he agreed.

The recipe was adapted from one given to me by a co-worker at my first full-time job in 1987.  I didn't work with her long, and have long since forgotten her name, but the recipe has been a family favorite ever since.  Well, let me qualify that...The Mister and I have always loved it.  My kids won't touch cabbage in any form.

I serve it with rice, because galumkis usually have a beef and rice filling, and it goes perfectly.  The recipe I'm giving you is meant to be made in a 13x9 inch pan and would serve 6-8.  Since I only had three people home for dinner, I cut the recipe in half for this post, therefore in the pictures you will see it in a 9x9 inch baking dish.

Lazy Galumpkis


1/2 a medium head cabbage, sliced up thin
1 carrot, grated
1 pound ground beef
1 onion, chopped fine
1 teaspoon garlic powder
salt and pepper
1 28 ounce can crushed tomatoes
1 cup shredded Parmesan cheese
2 cups grated sharp cheddar cheese


Preheat oven to 350 degrees.  Grease a 13x9 inch baking dish.  Spread half of the shredded cabbage in it.
Remember, I cut the recipe in half for these pictures.
Brown ground beef in a skillet on medium-high with the onion andseasonings.  Sprinkle grated carrot on top of cabbage, then pour ground beef mixture over.
Top with remaining cabbage.
Then pour crushed tomatoes over.
And top with mixed grated cheeses.
Tent dish with foil and bake at 350 degrees for 45 minutes.  Remove foil and continue to bake for 20 more minutes.
Serve with rice.  

Monday, May 2, 2011

Chicken Piccata

"I love chicken. I would eat chicken fingers on Thanksgiving if it were socially acceptable."

~Todd Barry
Last week I received a sample magazine in the mail.  It's called Cuisine at Home.  Not bad, actually.  I took note to try a few recipes in it.  The first one was French Onion Steaks, and was not blogworthy, but this chicken piccata recipe was fast, easy and light.  The piquant sauce with it's note of lemon was delicious and a lovely faux to young, sweet vegetables.  Perfect for spring. Is it my favorite chicken recipe ever? No. But it's a great, quick recipe, perfectly respectable when you would like to whip up something home-made and healthy.
Speaking of spring...here are a few shots I took during my 4 mile walk around the neighborhood last week.
I know these are edible, but I've never tried them.
Chicken Piccata

2 boneless, skinless chicken breasts, cut in half and pounded into cutlets.
salt and black pepper
All-purpose flour
1/4 cup vegetable oil
1/4 cup dry white wine
1 teaspoon minced garlic
1/2 cup chicken broth
2 tablespoons fresh lemon juice
1 tablespoon drained capers
2 tablespoons butter
Fresh lemon slices
Chopped fresh parsley

Season cutlets with salt and pepper, then dredge them in flour.  In a nonstick pan, heat oil over medium high heat.  
Saute cutlets 3-4 minutes on one side.  Flip them over and saute on the other side 2-3 minutes.  
Transfer cutlets to a warmed platter; pour off fat from pan.
Deglaze pan with wine and add garlic.  Cook for a minute, then add broth and lemon juice and capers.
Return cutlets to pan and cook on each side 1 minute.  Transfer cutlets to warm plates.
Add butter and lemon slices to sauce in pan.  Cook until butter melts.  Pour sauce over cutlets.  
Garnish with parsley and serve immediately.

Sunday, April 24, 2011

Lemon Mousse

"Seize the moment.  Remember all those women on the Titanic who waved off the dessert cart." 
~Erma Bombeck
Confession:  I am guilty of blog-neglect.  It's been three weeks since my last post.  In my defense, it is the height of garden-prep time in New England, so something had to give.  
Doesn't look like much NOW....but stay tuned...
Beginning of September, as summer was having it's last gasp, I made this and it was so good, I wanted to post it, but did not get a good picture.  Since then  I've been dying for more and Easter was a great excuse to make it, seeing I had dessert duty.
This Lemon Mousse is just luscious and was big hit.  The perfect accent to a light spring meal.  I prefer it slightly tart, but you can adjust the lemon to your liking.  Also, if you're squeamish about the uncooked egg whites, you can actually leave them out, using only the whipped cream  (in this case, increase cream to 2 cups).  It won't come out as cloud-like light, but it will still be fluffy and delicious.  
light as a cloud
As an added bonus, it keeps well for up to four days which is quite handy around busy holidays.
Lemon Mousse

2 whole eggs
4 eggs, separated
1 cup sugar
1 1/2 tablespoons lemon zest
1 cup freshly squeezed lemon juice (I got this from 4 lemons)
1/4 teaspoon salt
2 teaspoons Knox gelatin powder (1/2 packet)
1 1/2 cups whipping cream
1/4 cup confectioner's sugar
-----------------------
1 cup whipping cream
1/4 cup confectioner's sugar
1/2 teaspoon pure vanilla extract

In a large glass or metal bowl, mix together the 2 whole eggs, 4 egg yolks (save 2 of the whites in a separate bowl), sugar, lemon zest, lemon juice, Knox and salt.  Place the bowl over a pot with a couple inches of boiling water in it.  Keep the water at a boil, but do not let the bottom of the bowl touch the water.  Stir constantly until mixture starts to thicken (takes approx. 15 minutes).  
Set aside to cool.  At this step, what you've got is lemon curd.  It could be used between cake layers, on scones, biscuits or as a pudding.  Cover with plastic wrap placed directly on the pudding, so it doesn't form a skin.  Refrigerate 2 hours or until completely cooled.

In a medium bowl, whip the egg whites until stiff.  Fold into cooled lemon curd.  In a medium bowl, whip the 1 1/2 cups of cream with 1/4 cup confectioner's sugar until you get stiff peaks.  Fold cream into the lemon mixture.  Now spoon into a soufflé dish, or individual glasses.  Serve cold with sweetened whipped cream (last 3 ingredients whipped together).  Serves 8.  It will keep for 4 days in the refrigerator, but if you store it, be sure to wait to decorate it with whipped cream until close to serving time.

Thursday, April 7, 2011

Orange Scones

"All happiness depends on a leisurely breakfast."

~John Gunther
Simply orange

I just had one of these for breakfast, hot from the oven, and it was heavenly.  For weeks the recipe was tumbling around in my mind, just waiting for a free day to be liberated.  Orange-cranberry is a common combination for scones, and I tried those first, but prefer the simply orange version best.  
The orange-cranberry version
They were so good, I'm going to make more today and freeze them in the raw stage...ready to pop in the oven any morning the mood strikes.  When I made this recipe, I baked two immediately to give to a friend who was coming by, and I placed the remainder in the fridge, to be baked in the morning.  The scones that rested and chilled overnight actually rose higher and came out better.  And what could be easier than popping them in the oven when you wake up?  Start your coffee, walk the dog and twenty minutes later, viola!... hot orange pastry nirvana.  I started with the basic scone recipe from the King Arthur Flour Baker's Companion.
The first attempt was a tiny bit dry, so the second try I added a little more liquid and they came out perfect.  Environment and altitude can affect the composition of the dough, so use your judgement when adding the liquid.  It should just come together, without being wet.  I've included pictures so you can see what the dough should look like.
Orange Scones

3 cups all-purpose flour
1/3 cup sugar
3/4 teaspoon salt
1 tablespoon baking powder
the zest from two oranges (about 2 tablespoons)
2 large eggs
2 teaspoons vanilla
1/4 cup buttermilk
1/4 cup orange juice, plus 1 tablespoon (or a little more, if your dough needs it)
4 tablespoons very cold butter, grated 
1/4 cup shortening

1 egg, beaten with 1 teaspoon water, for brushing on top
Coarse or large grain sugar for topping

Glaze: (optional)
1/2 cup confectioner's sugar
1 teaspoon orange zest
2 teaspoons of milk, plus a few drops more, if needed to produce a glaze that will pour

Preheat oven to 450 degrees.
In a medium bowl, whisk together all the dry ingredients, including the zest.
In a separate bowl, whisk together the eggs, vanilla, buttermilk and orange juice.
This next step is important, because it will determine the texture of the scone.  You can use just cold butter, just shortening, or a mixture of both.  I tried it with just butter and the combination, and the combo came out better.  With the shortening, pinch small marble size pieces and drop them into the dry ingredients. It's not as messy as it sounds, if you get some flour on your fingers, the shortening doesn't stick.  Don't be tempted to use a pastry blender for this recipe, it will produce a tough, mealy texture with this recipe.

Grate the VERY COLD butter in after the shortening.  
Working quickly (don't want the butter to warm up) add the liquid, stir a few times to bring dough together, and then turn out onto a floured cutting board.  Be careful, too much mixing or kneading at this point will produce a tough, heavy scone.
Gently fold and gather dough together until it's cohesive.
At this point you can pat the dough into a 10 inch circle and cut into wedges, or alternatively, pat into a square about an inch thick and use a bisquit cutter, cut out round scones.

Brush the scones with the beaten egg, then sprinkle with coarse sugar.  Bake for 7 minutes, then turn the oven off and without opening the oven door, let the scones remain in the oven for 8-10 minutes.  (It's important to bake the scones on the middle oven rack.)  Remove the scones from the oven and cool minimally on a rack.

If desired, stir together the glaze ingredients in a small bowl, adding milk just until the glaze will run off a spoon.  Drizzle over warm scones. 
Serve the scones immediately or within a few hours, for best flavor.

This dough lends itself to being made ahead, shaped, and either frozen or refrigerated overnight before baking.  For frozen scones, add 2 minutes to the baking time before you turn the oven off.

Friday, April 1, 2011

Apricot-Orange Marmalade

I got the blues thinking of the future, so I left off and made some marmalade. It's amazing how it cheers one up to shred oranges and scrub the floor.
~D.H. Lawrence (1885-1930)
I went to Florida recently with marmalade on the brain and a mission to find some Seville oranges, since after much research, they kept popping up as the orange of choice for good marmalade.  David Lebovitz's recipe, and blog comments were very helpful as I started looking into methods.  I didn't use his recipe, but his and the readers comments came to mind and were helpful when I was developing my own.  Marmalade holds a nostalgic place in my heart since it was the very first preserve I ever made, at around 13 years old.  The second was apricot, so I wanted to combine the two.  The result was an intensely flavored, not overly sweet, tangy and lusciously orange marmalade that was NOT BITTER!  
From what I read, the English prefer their marmalade bitter, but I don't, so I went to pains to remove the pith (root of bitterness) from the rind before I sliced it up.  You can leave it on if you prefer.  
I never did find Seville oranges in Florida.  They are grown in Spain, but I thought I might find them in the Citrus state.  Nope.  I even tried an orange farm warehouse.  After more research, I settled on using the readily available (in Florida) Valencia oranges.  I'm so happy with the results that going forward, I wouldn't bother trying anything else.  I made this two weeks ago.  It's best if you let it sit for a week.  Well, I gave a jar to my mother and she called today to say it was "absolutely fabulous!"  Woo-hoo!

If you would like to make this, but have never made preserves, I suggest you pick up a good book on canning.  My favorite is 250 Home Preserving Favorites.  Concise, easy, and all the recipes are for small batches (4-8 jars).  There is a link to it in my sidebar.  With my recipe, you need to start the day before.  It breaks up the work, and gives the natural pectin longer to do it's thing.

Apricot-Orange Marmalade

Cheesecloth
Kitchen string
5 Valencia oranges
6 ounces dried apricots
1 lemon
granulated sugar
water
pinch salt
dot of butter
2 tablespoons scotch, Grand Marnier or Cointreau

Makes about 6 8-ounce jars.
Day before:
1. Place the dried apricots in 2 cups of water.  Bring to a boil, simmer 20 mins then let sit for 40.  Pulse in a food processor until chopped chunky.
2. Cut oranges in half and squeeze out the juice.  Remove seeds and place in a square of several layers of cheesecloth.  Cut oranges in half again.  Scrape membranes from peels and add to cheesecloth; tie with string.  
Scrape as much of the white pith off the peel as possible.  Slice peel sliver-thin. I found the peels from 4 oranges was enough.
3. Zest and juice the lemon.  Add seeds to cheesecloth bag.
4. Measure combined volume of juices, peel and apricot mixture. Add half as much water.  For instance...if the combined amount of fruit mixture is 8 cups, then add 4 cups water.  Place in a large Dutch oven or heavy-bottomed pan, such as a Le Creuset.  Place a cheesecloth bag in center of pot and bring to a boil over high heat.  Reduce heat and simmer, stirring occasionally and squeezing cheesecloth bag several times, for about 2 hours or until peel is very soft.  Cover and let sit overnight.
Next Day:
5. Measure the peel and liquid, squeezing cheesecloth bag; discard bag.  Stir in 3/4 the volume in sugar.  For instance, if there is 4 cuts fruit mix, then add 3 cups sugar.  Bring to a boil over medium heat, stirring constantly to dissolve sugar.  Add a dot of butter (to reduce foam).  Boil rapidly, stirring often, for 10 to 15 minutes or until marmalade thickens or reaches 220 degrees on a candy thermometer.  Test for setting point. 
If you do not have a candy thermometer, use the cold-saucer test: Remove the pan from the heat and place a spoonful of hot jam on a chilled plate. Place in the freezer for 1 minute; draw a finger through the jam on the saucer. If the jam does not flow back and fill in the path, it is thick enough. If, after 25 minutes it has not set, stir in 1 tablespoon dry instant fruit pectin.
6. Remove from heat and stir for 5 to 8 minutes to prevent floating rind.  At this time, stir in the scotch, if desired.
7. Ladle into sterilized jars to within 1/4 inch of rim; wipe rims.  Apply prepared lids and rings; tighten rings just until fingertip-tight.
8. Process jars in a boiling water canner for 10 minutes.  Transfer jars to a towel-lined surface and let rest at room temperature until set.  Check seals; refrigerate any unsealed jars for up to 3 weeks.  It's best if you let it sit for a week.